Firing spoons
Spoons for Sale
| Like most people, I like wood and I like hand-crafted art. The last art class I can recall was in junior high, where I distinctly remember crafting a crude nondescript clay animal while watching my table partner carve a cat that actually looked like a cat. Mine was suitable for the dump heap when it was done, and I realized that perhaps my talent wasn't along the art lines. I made no more serous attempts at art outside of the sewing and quilting arena until I first met Dan Dustin at the League of NH Craftsmen Art Fair in Sunapee. His spoons were gorgeous, but I couldn't put my finger on what it was that was so wonderful about them. ====>> |

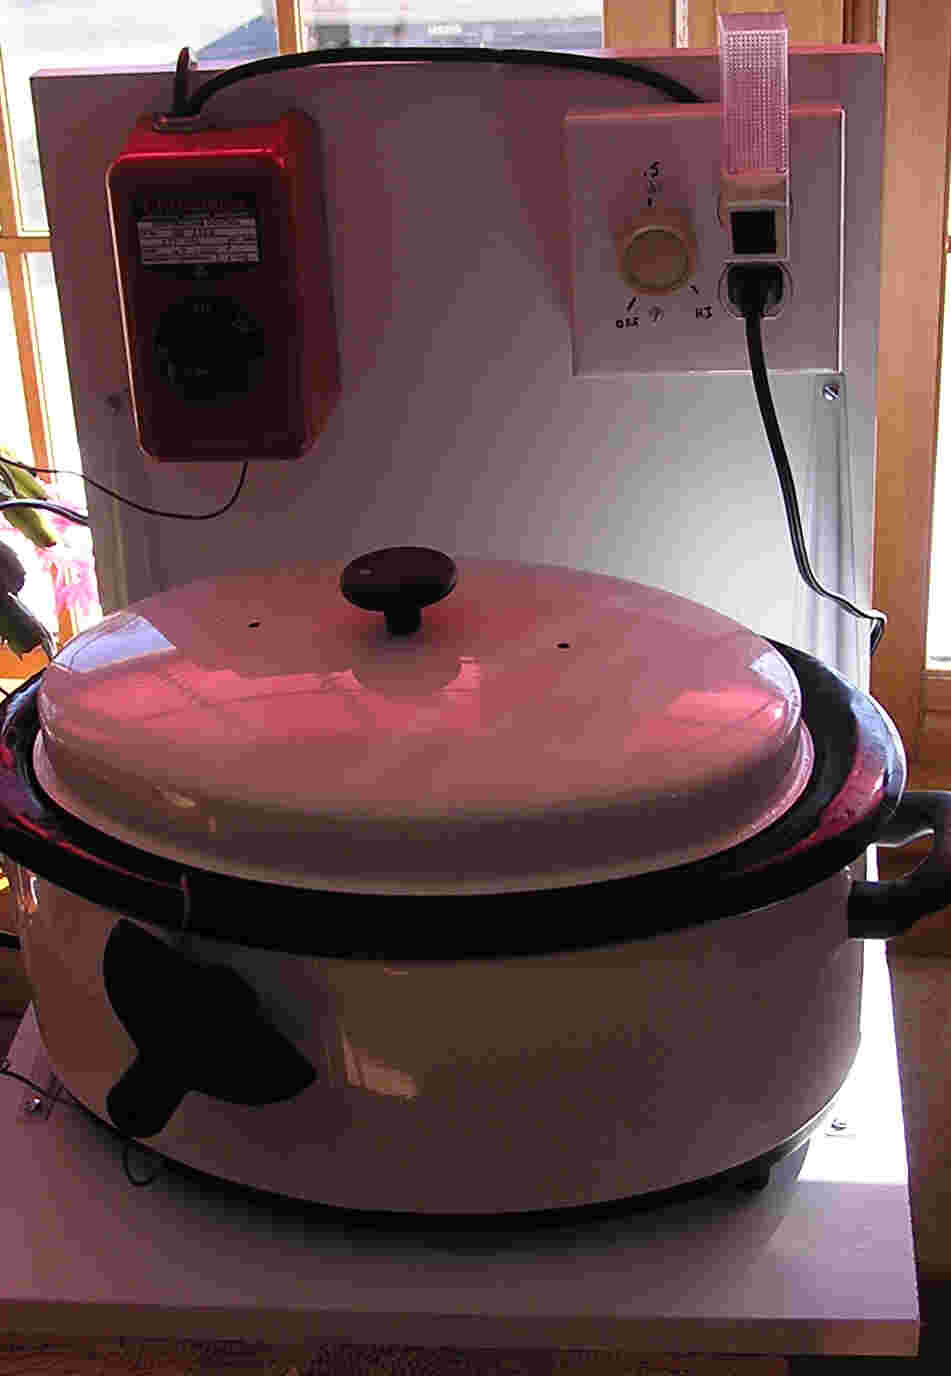
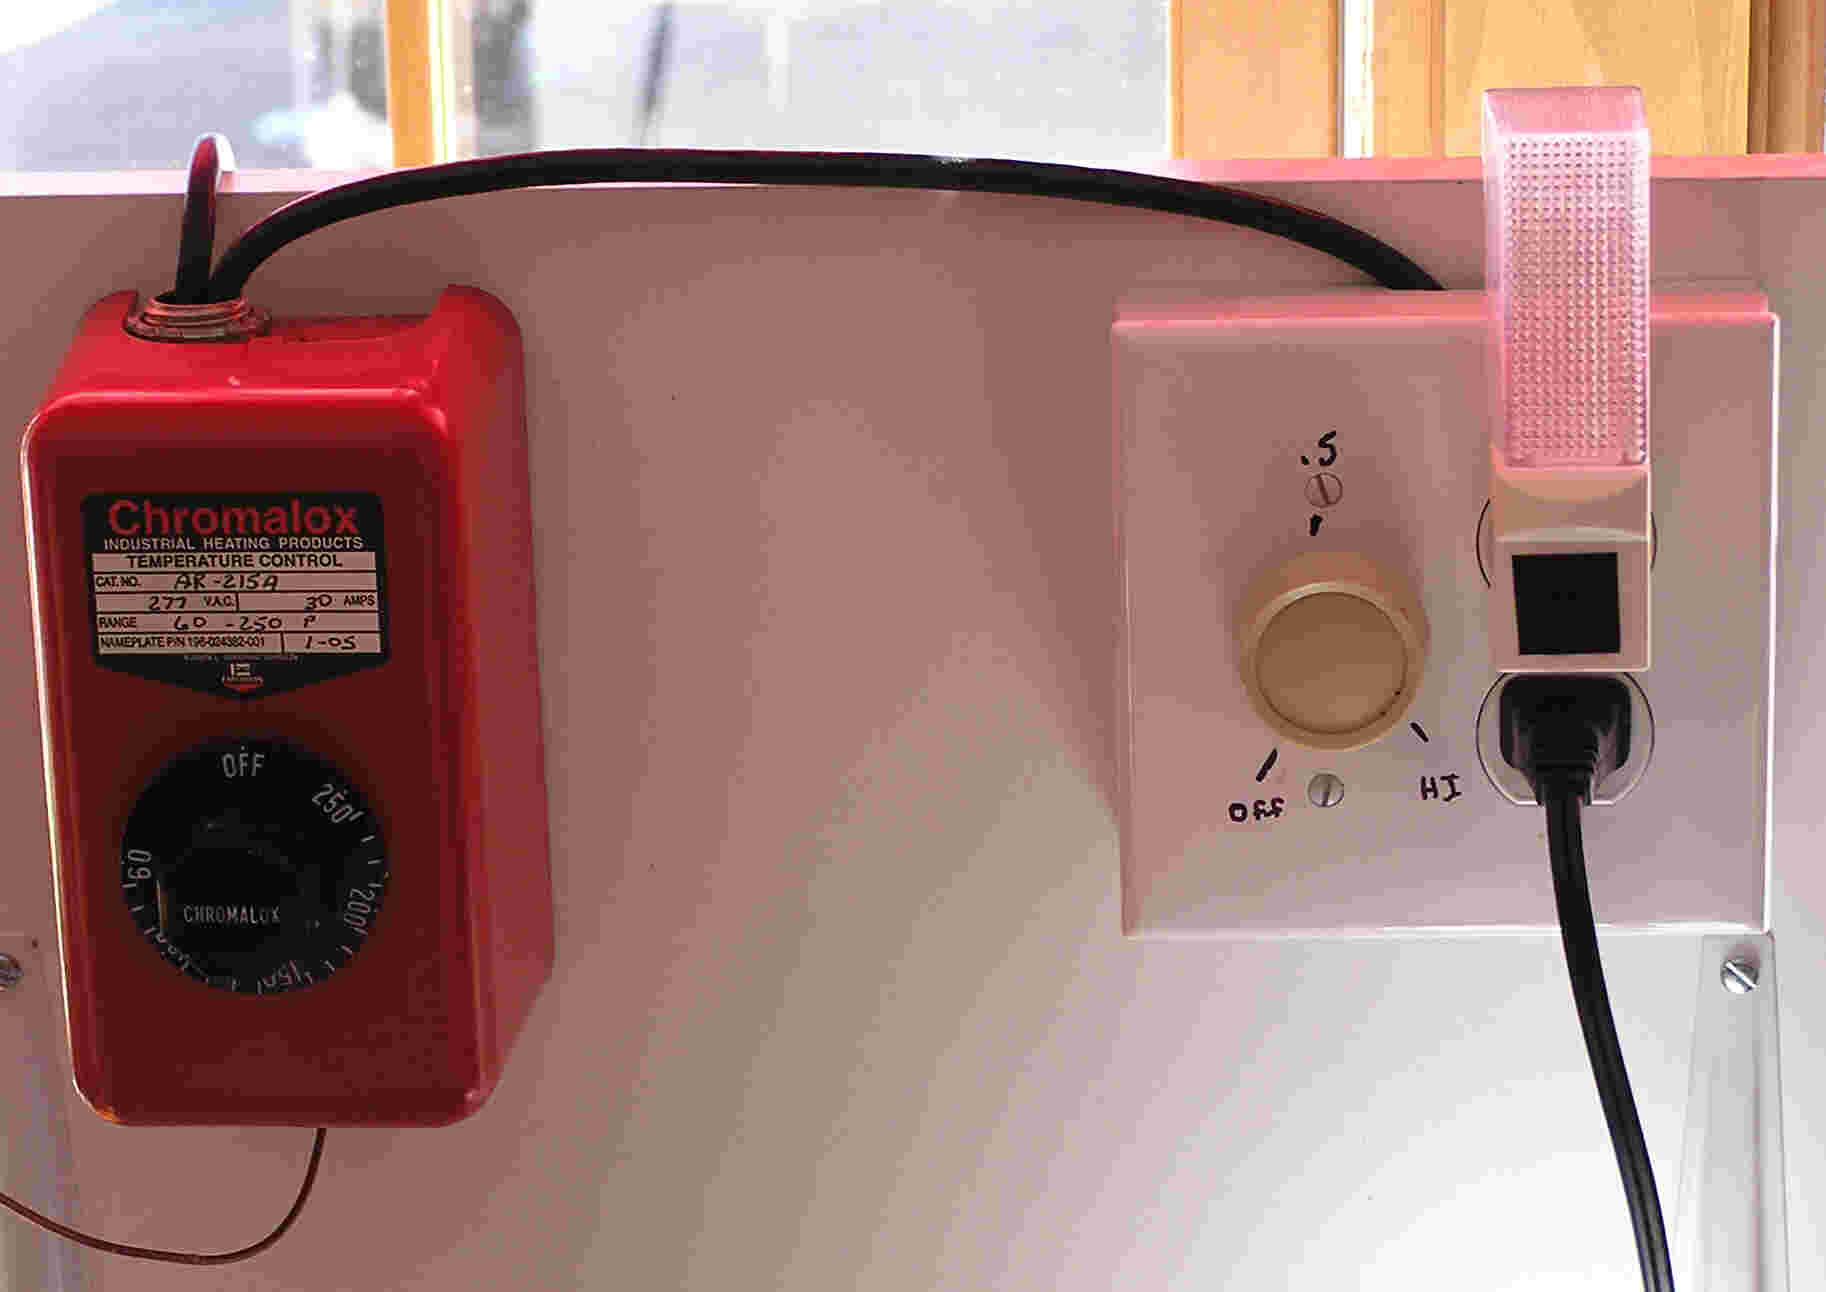
I didn't buy a spoon from Dan that first year, but several years later I went back and bought my salad set. My fortuitous 2004 search of a similar salad set for a wedding gift led me to learn spoon carving. At that art fair, Dan informed me he was teaching his craft at the Kimball Jenkins Art School. So, now I'm a lawyer, seamstress, reenactor, and a quilt and spoon maker, and of course a mom! That's a forever thing. If you want to learn more about spoons making from Dan, you can listen to NH's Public Radio's "Front Porch" interview on Dan's spoons. The secret to the spoons is in the firing, which involves heating them slowly in a mixture of beeswax and walnut oil. That method "make the wood think it's still green" according to Dan, and make the spoons a lot stronger. The Concord Monitor also did an article on Dan. |
|
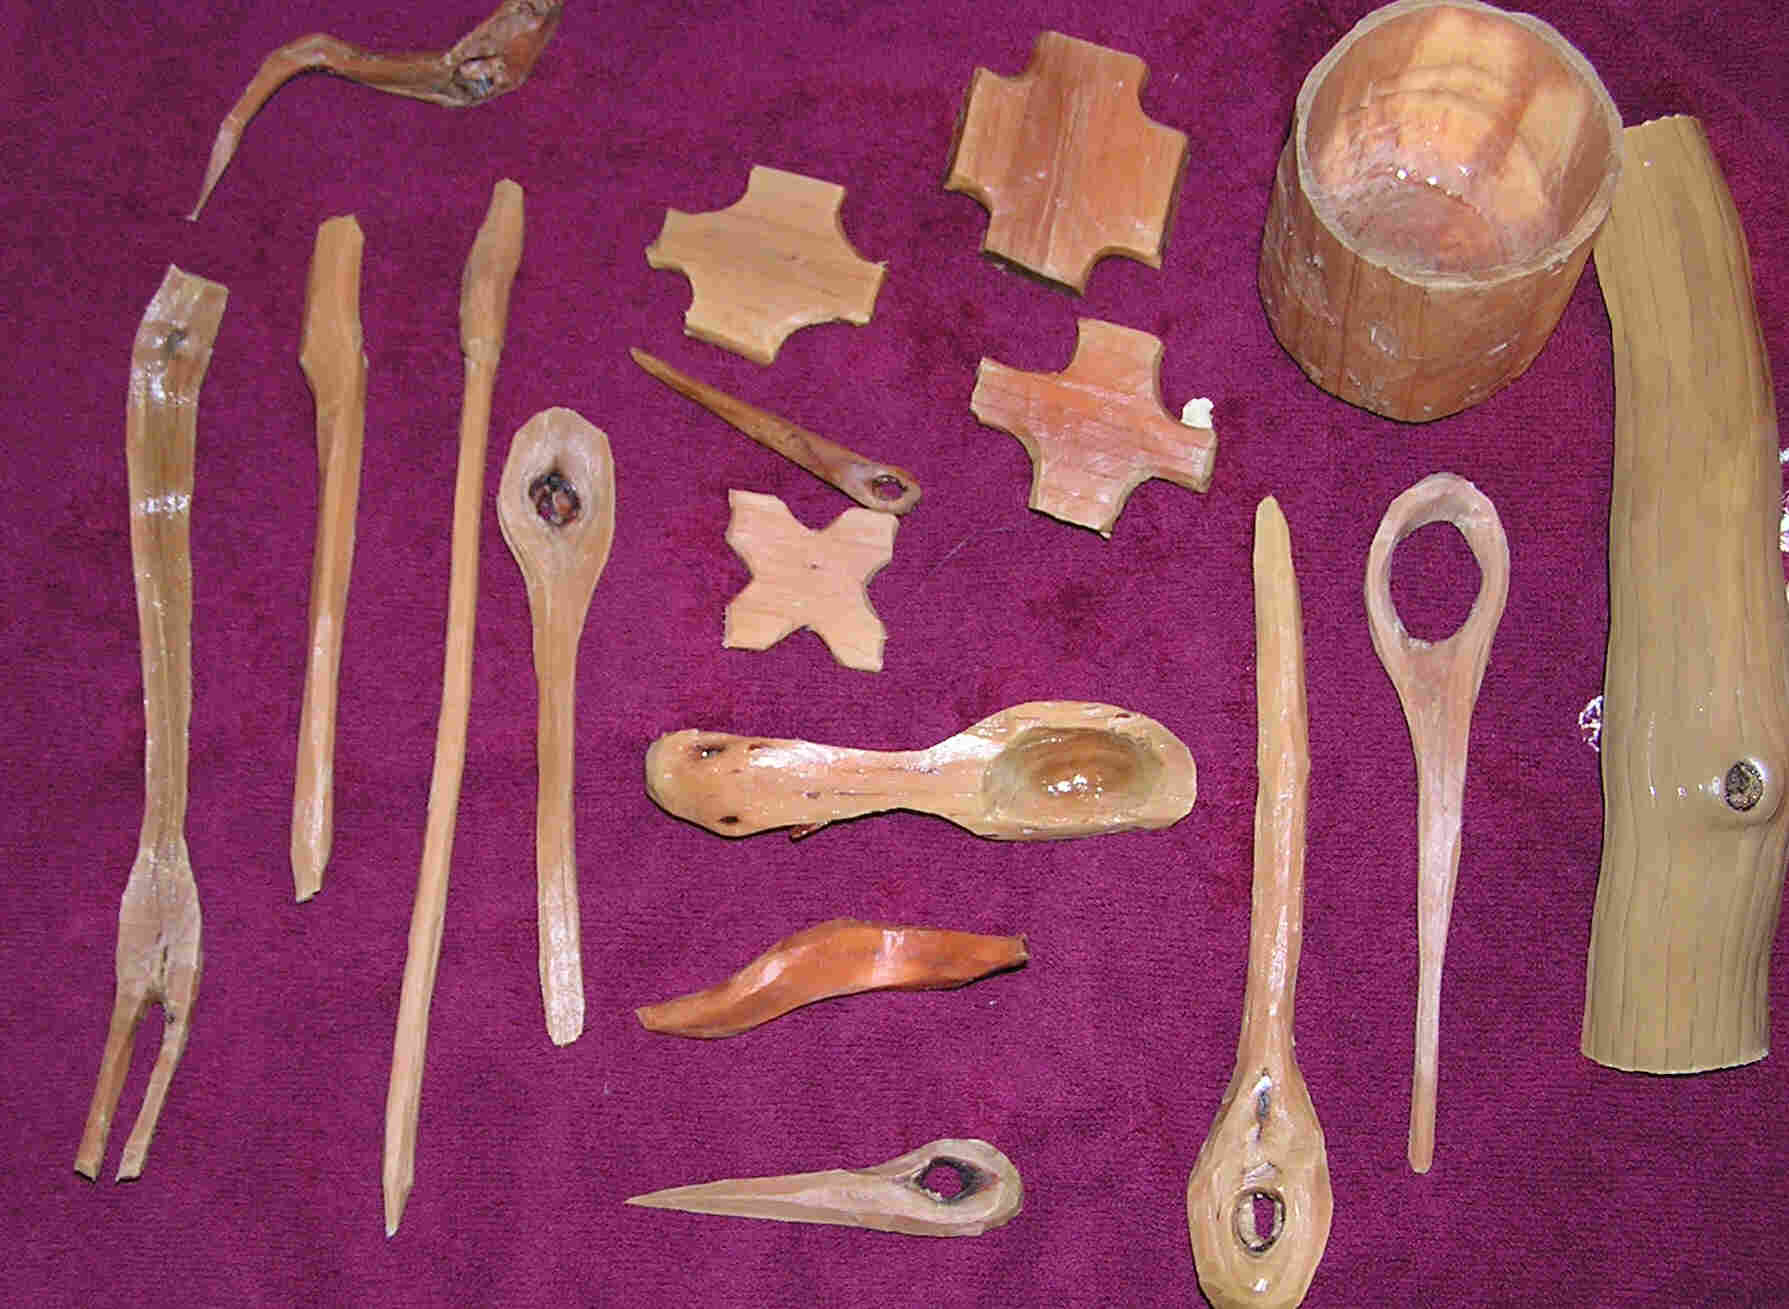
Here's a collection of things I tried my first year -
spoons, a fork, natural needles, a " 'noggin," and a couple of "thread
winders" ready to be fired. Most folks wouldn't bother to carve the
thread winders, but I reenact, so I thought I'd try a couple.
The 'noggin cracked in firing. I keep it in the wood tool
storage bin for holding the leather price tags. Every once in a while
I take it out and try to sand it into something beautiful, but so far, I
havent' had a lot of luck with that. Try again. . . . . . |
|
|
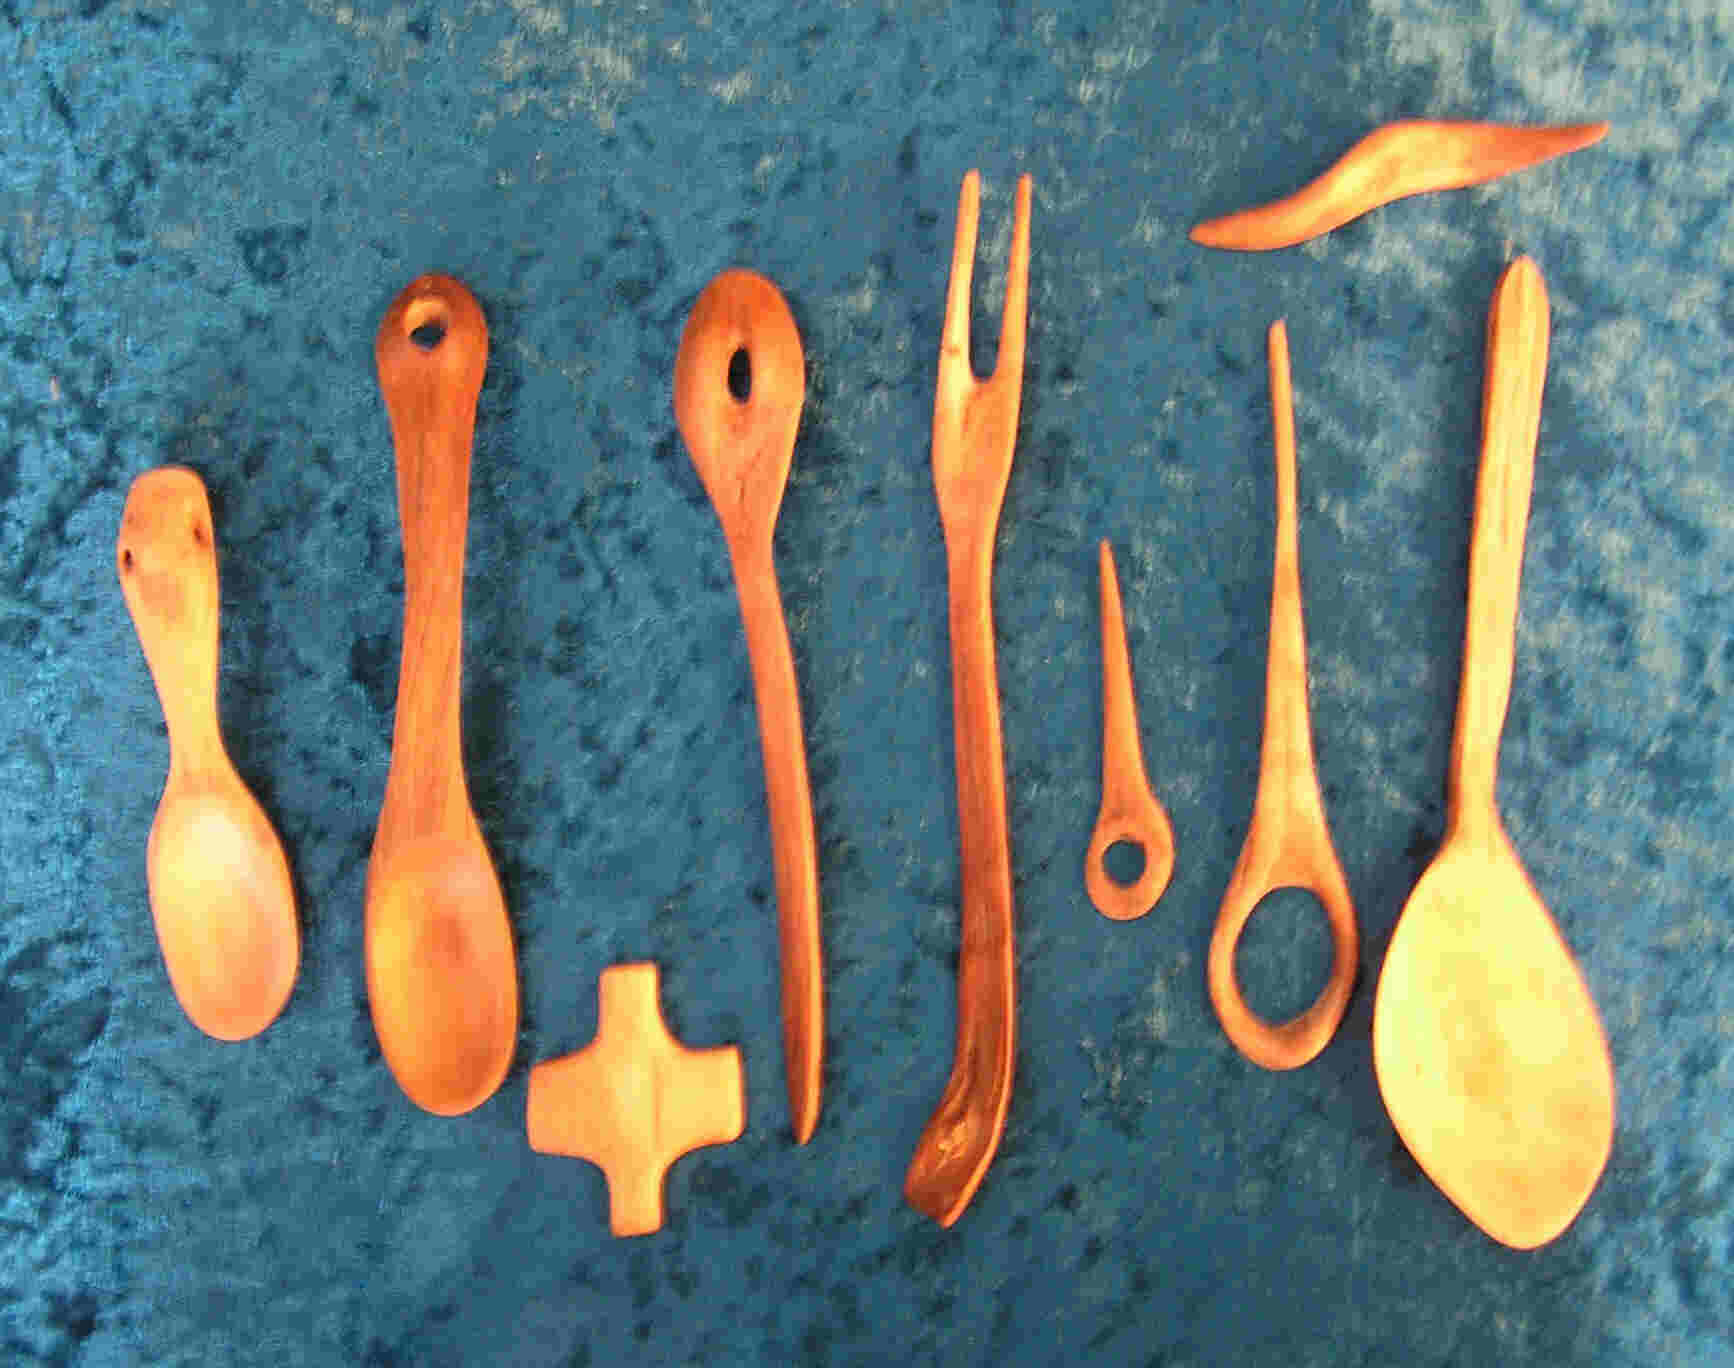
Here are some of the 2004 items pictured above finished. Don't ask me what that twisted piece of wood is. It just was a scrap from the floor of the art studio and wanted to be carved. It's a bit big to use as a necklace. As this was the first firing from my new wood cooker, I was very pleased with the results. Could you tell the second spoon from the left here is from the uncarved wood on the above-picture at the right? The big spoon on the right was my "class best" spoon, so I tossed it in the picture. The fork is for reenacting. They hadn't thought of more than two tines in 1776. Hey, it beats the Pilgrims. They hadn't invented forks yet, so if you go for Thanksgiving dinner at Plimouth Plantation, you get a spoon to eat with - period. |
| Dan discusses in his Front Porch interview
the fact that many of his student's spoons don't make it to the
end of the class because they're given away. These made
it to the end, but only because he did a firing just before the last
class in December. They were Christmas presents. |

|
2005 - 2006
I'm getting more prolific, so I've added a page on Spoons for Sale. Most of them are there. Here are some of my favorites I've kept or given as gifts.

|
I wanted to learn how to carve
small spoons this year. This was my best attempt. I think I did fairly
well, no? I used the Manzanita I picked up n the summer of 2005 in
California. I'm going
to see if I can make some small salt bowls to use it with the spoon. Look ma, my first piece of drug paraphernalia!
(OK in the interest of full disclosure, it's the first one I've made
- I tossed my much beloved and only other piece of drug paraphernalia when
Hannah was about three. It had been nothing more than a fond remberance
for many years by then anyway.) The needles will be useful as bodkins for lacing women's reenacting clothing. |
|
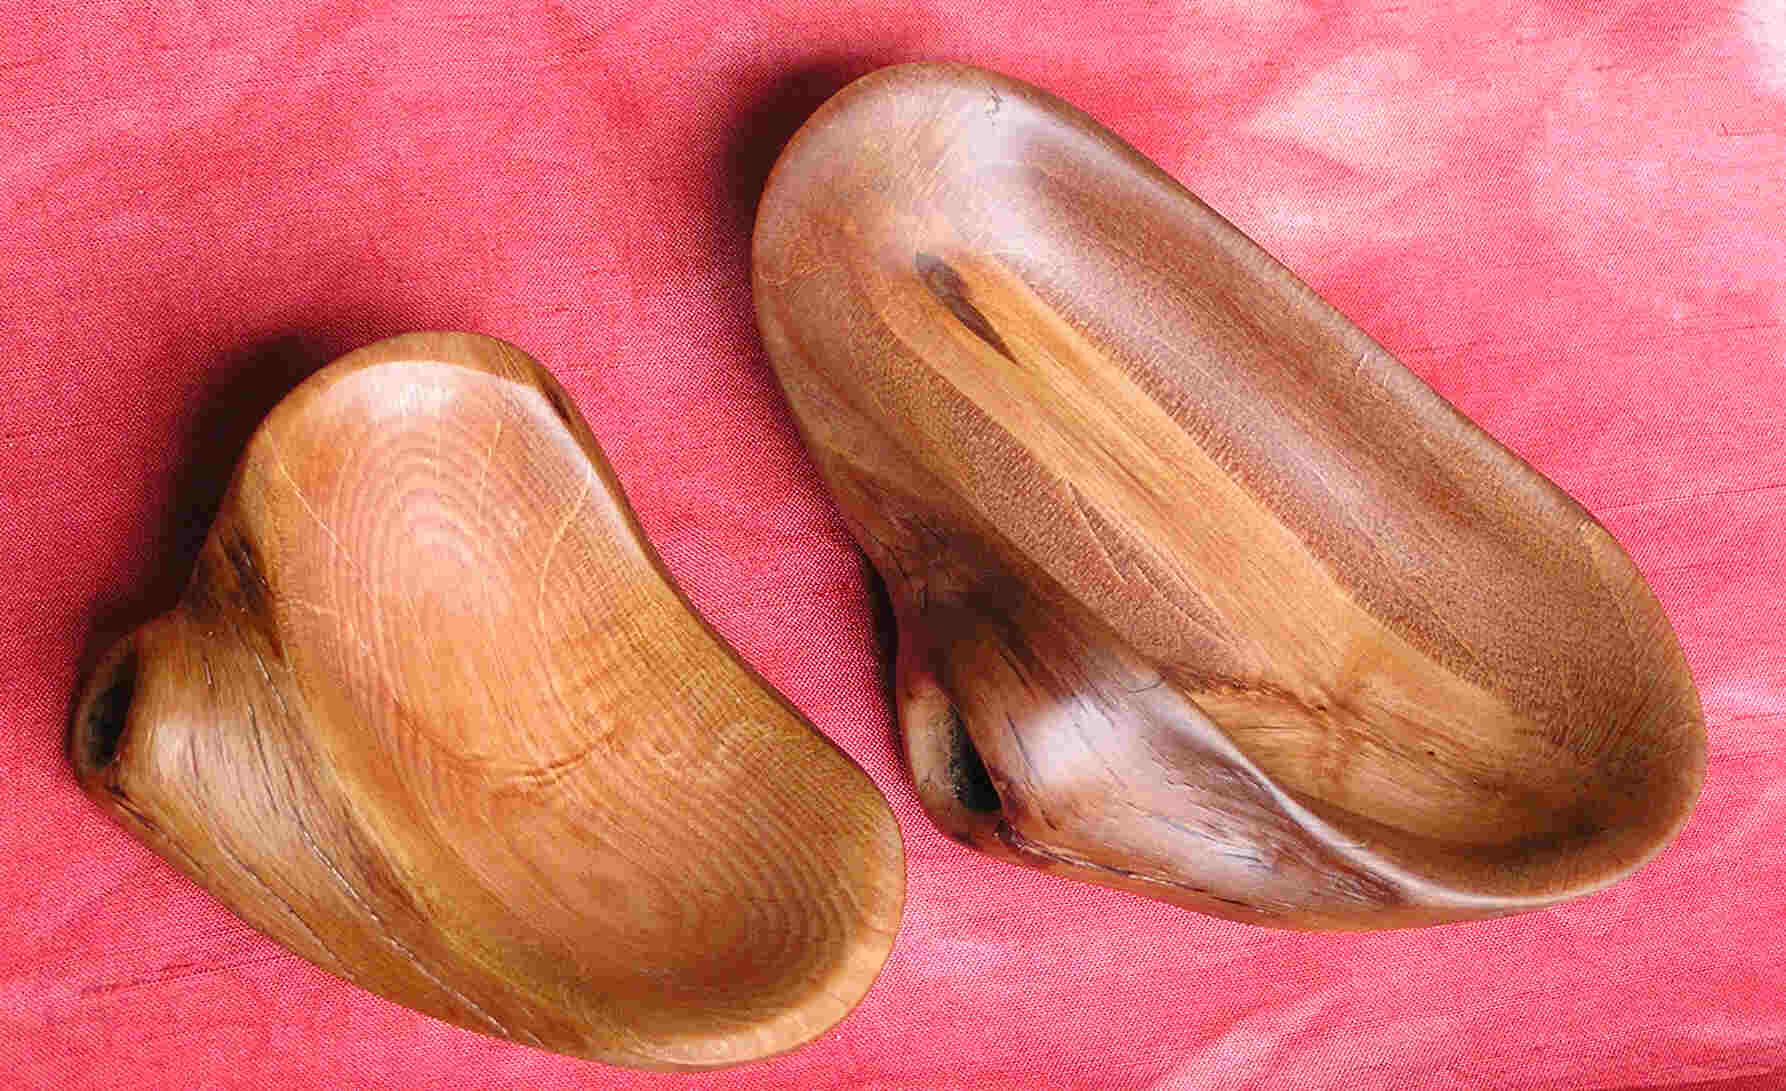
I had spare piece of wood that wanted to be a small bowl - somewhat
like the bowl I want to carve for the small spoon above. That's the
left hand bowl. I carved it, and tossed it on my dresser to hold earrings
and my wedding ring. When I found a slightly bigger piece of wood that
also wanted to be a bowl, I carved that for my daughter. I'm jealous.
It looks like a perfect miniature trencher. I like Michelle's much
better. Oh well, there will be more where that came from. |
|
|
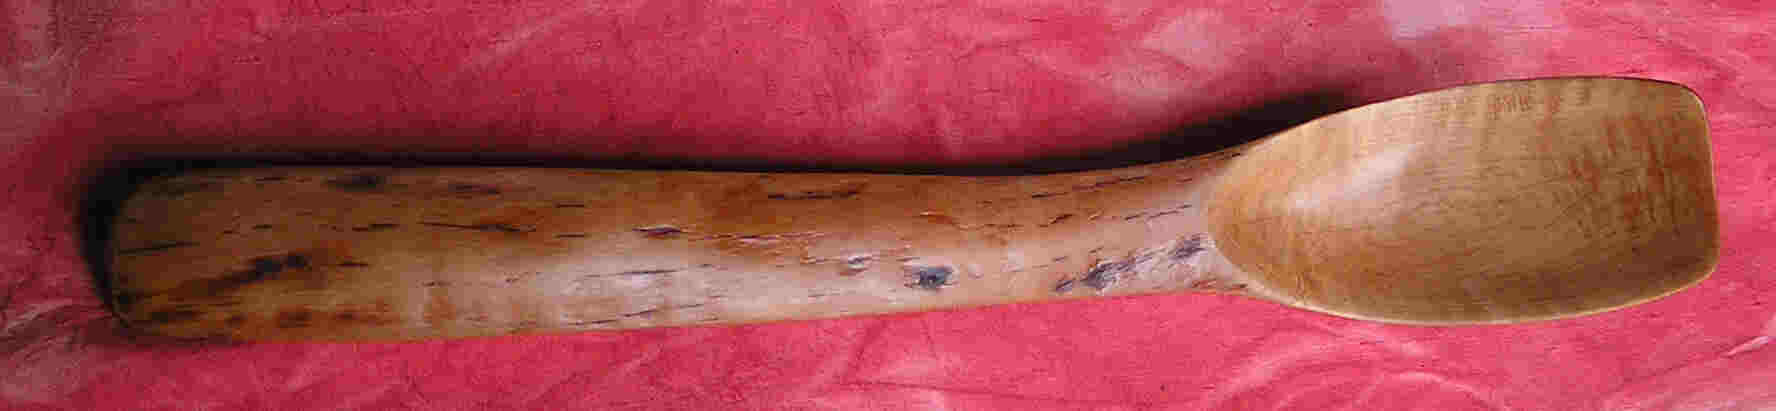
I made this spoon with the flat leading edge
for stir frying right after the 2005 spoons class was over. Dan really
liked it! We use it a lot. |
|
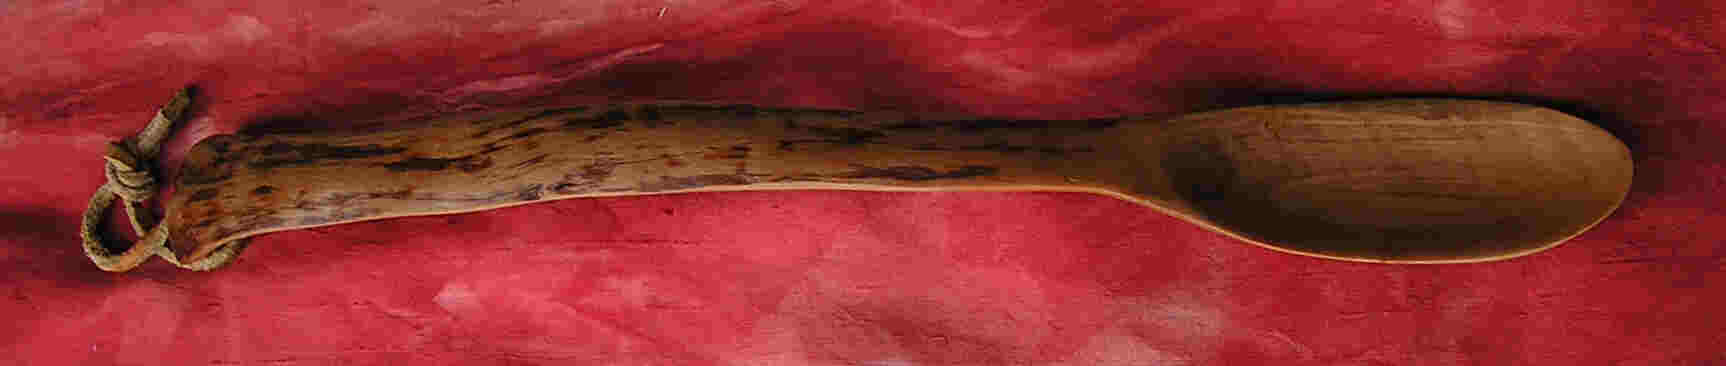
This spoon is slightly longer than the wok spoon. It's hard to see the lovely curve of the handle. |
|
|
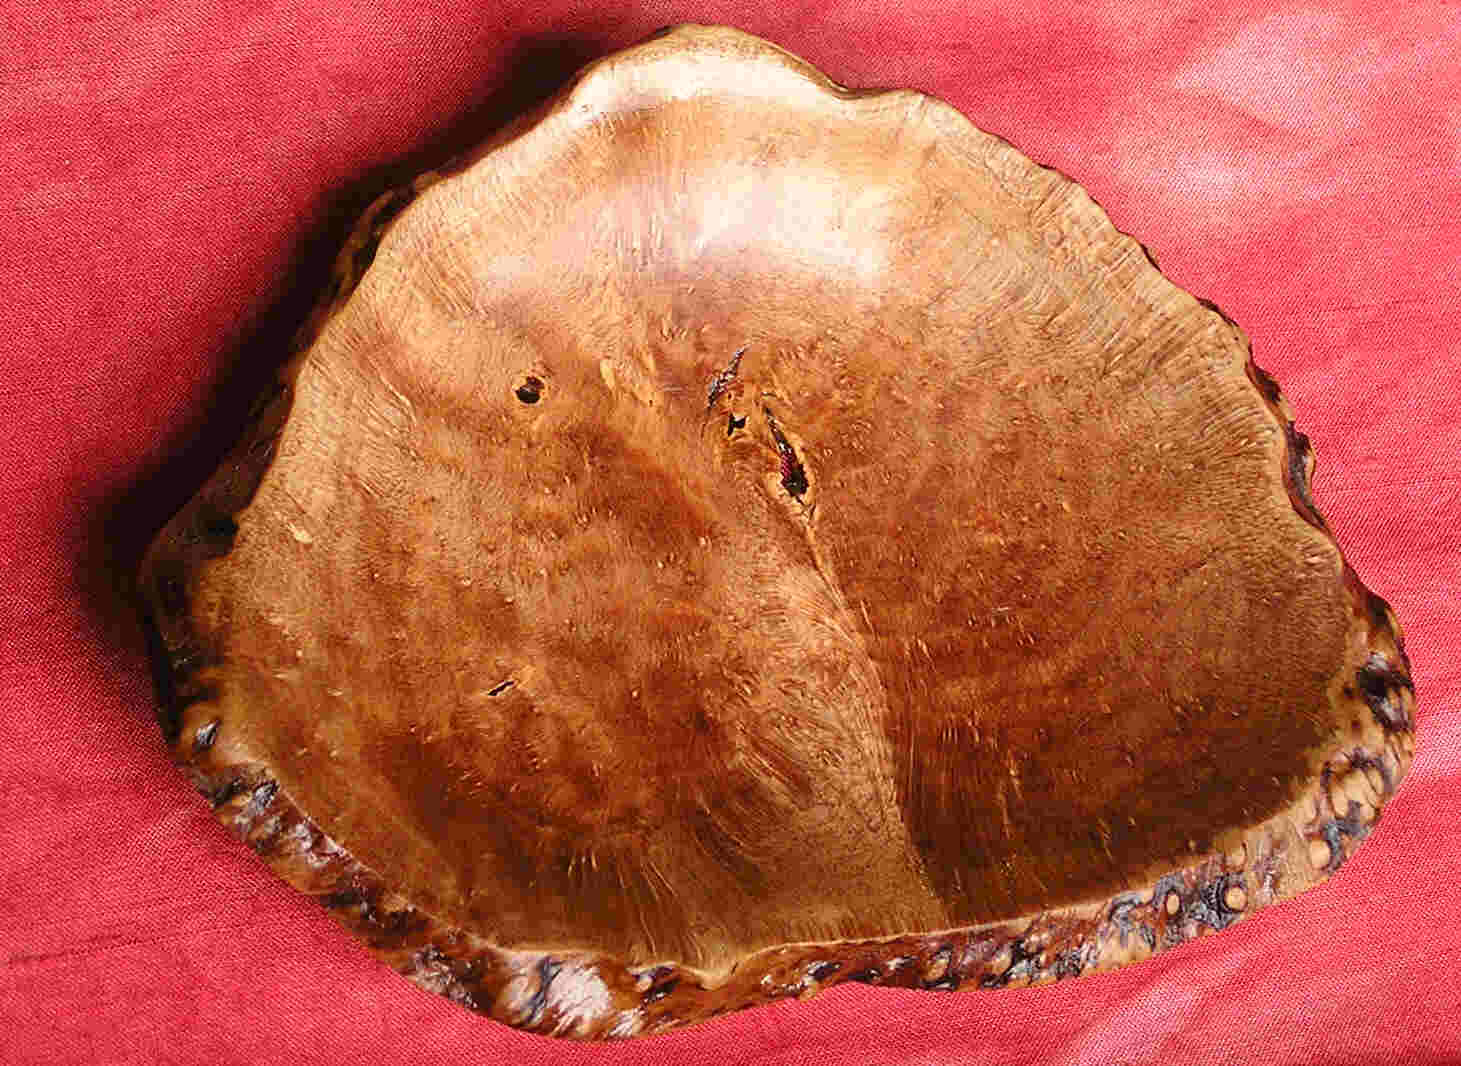
I stopped by Dan's house in spring 2006 to see if he had my student art show spoon when I saw his car out front. He didn't, but he gave two of these bowls he had carved. They split, so they're no good for selling, but I stayed up all night to see how it sanded out. Even imperfection can be beautiful. I love it! |
Links of Interest for wood affectionados:
What would a hobby page be without a couple of links to some wonderful links so you can check out other folk's ideas?
|
The best part of taking the spoons class twice was that I wouldn't
have found out about the book that was inspired by Dan Dustin.
It's written by a Dartmouth professor, and is quite good. A lot
of Dan in it, but he's much more the quintessential 60's hippie who never
went through the awful hippie-correction stage - the "yuppie" stage. I
also refused to go through the "yuppie" stage, but I was just a little too
young for total immersion in '60s culture. At any rate, the book is
called Spoonwood.
Pick up a copy if you're into spoons. It's quite good! |

|
On the family vacation to visit Ric's brother and sister in California and Oregon last summer, we stumbled across "It's a Burl". I was enthralled, bought a couple of burls I tossed in my suitcases on the way home, and decided maybe some year when we go out there, I'll put the trip together with some paid instruction. Not a thing like spoons, but this guy has some GREAT stuff, most made out of various kinds of burls mostly, including Manzanita. The next town we hit after we visited here, I insisted Ric buy me a pocket saw to get some fresh. See the itty bitty Manzanita spoon and needles further up. They look ENTIRELY different than the burl work this guy does.
I don't tend to need a lot of support to have fun doing something, but if you're a woman into woodworking, and you want to make some contacts, this is the place to do it.
And of course there are some spoon maker and other wood crafter sites. In no particular order:
Norm Sartorious - he and Dan had an audiotapecorrespondence going for a while. I'm sure Dan was happy to tell him he was doing things all wrong, but he has spoons featured in June 2006 Woodwork Magazine. They're quite lovely.
Another spoon maker was featured in Woodwork Magazine,same issue. You'd think we have a shortage of spoons in this country. Barry Gordon He's from Syracuse, and he also teaches.
Then there is "Spoonlady" from California. Not as individualized, but lovely.
Rustic Wood Designs
Wood Basket from mountain laurel
Do a google search on mountain laurel, and you'll eventually find these pages:
What is a "spoon tree?"
And the derivation of the word "spoon." It means split of wood! We learned that the first night of class.
Last updated 2006 May 6. Contact Paula Werme